 1")
I’ll be honest—February is when I make most of my hydrangea mistakes. The garden is quiet, I’m restless, and those bare sticks poking out of the ground look like they need something from me. A prune? A feed? A nice thick blanket of mulch? I’ve done all three on the wrong plant at the wrong time and lived to regret it.
The thing is, February matters more than you’d think for summer blooms. Get it right, and you’re setting yourself up for those Instagram-worthy flower heads that droop under their own weight. Get it wrong, and you’ll spend July staring at leafy green bushes wondering where all the flowers went.
Some hydrangeas need you desperately this month. Others need you to back off and let them sleep. The trick is knowing which is which—and trust me, I learned the hard way so you don’t have to.
If you’re staring out the window wondering what on earth to do with your hydrangeas this month, I’ve been there. To help you avoid the mistakes that cost me an entire season of flowers, here are six important tasks to consider. Some apply to all hydrangeas, others are specific to certain types, and I’ll walk you through exactly what to do—and what to absolutely avoid—for each one.
1: Mulch Now To Protect Roots
 2")
Missed your fall mulching window? Join the club. Life happens, holidays happen, and suddenly it’s February and your hydrangeas are sitting naked in the garden. The good news—you haven’t ruined anything yet. But you do need to move fast.
February is the month when the ground starts to shift, and because hydrangeas have such shallow root systems, they are incredibly susceptible to frost heave. This happens when the soil freezes and thaws repeatedly, acting like a slow-motion elevator that pushes your shrubs right out of the earth and exposes their tender roots to the killing cold.
What should you use? Whatever is lying around. Compost, shredded bark, straw, pine needles. And yes, pine needles are perfectly fine here—that old warning about them acidifying soil is garden myth nonsense. Use them without worry.
The only trick is avoiding the dreaded mulch volcano. Don’t pile it up against the stems like you’re building a tiny mountain. That traps moisture and invites rot. Instead, leave a clear ring of bare soil around the base—about the width of your hand—so your shrub can breathe.
2: Protect Buds From False Springs
The most heartbreaking garden tragedy? Watching a hydrangea survive the depths of January only to lose its blooms in February.
 3")
Varieties like Bigleaf, Mountain, and Oakleaf hydrangeas bloom on “old wood,” meaning they actually formed their flower buds last summer and have been carrying them through the winter. The real danger this month isn’t the cold itself—it’s the “False Spring.” Those unseasonably warm days trick the buds into swelling and waking up, only to be blasted by a sudden, sharp frost.
If you see temperatures dipping after a warm spell, you need to act fast to save this year’s display.
For shrubs in the ground, wrapping them in burlap or even tossing an old bed sheet over the branches can provide just enough insulation to keep those tender buds from freezing. Growing hydrangeas in containers? Even simpler—just drag them into an unheated garage or shed for the night.
One last thing: be careful with heavy snowfall. I know it’s tempting to shake the branches to relieve the weight, but frozen wood is incredibly brittle and will snap in an instant. Always use a gentle sweeping motion to clear the snow instead.
3: Prune New Wood Hydrangeas
Pruning anxiety is real, but for these hydrangeas, February is actually the safest time to get your hands dirty.
 4")
If you’re growing panicle varieties like ‘Limelight’ or ‘Bobo’, or smooth hydrangeas like the classic ‘Annabelle’, you’re in the clear. These plants bloom on “new wood,” meaning they produce flower buds on the fresh green growth that emerges this spring. You literally cannot accidentally snip off this year’s display.
Start by removing the “Three Ds”—any wood that is Dead, Damaged, or Diseased—along with those annoying spindly stems that cross and rub against each other.
Once the messy stuff is gone, take a deep breath and cut the remaining healthy stems back hard, leaving just one to three sets of buds near the base.
Yes, it feels drastic. I remember the first time I did this, I was convinced I’d killed my ‘Limelight.’ But this “hard reset” forces the plant to push all its energy into thick, sturdy stems capable of holding up those massive flower heads without flopping over in the summer rain.
Just make sure your bypass shears or loppers are freshly sharpened. A dull blade crushes the stem tissue and invites disease, while a clean cut heals quickly. Your hydrangea will thank you with blooms so heavy you’ll need to stake them.
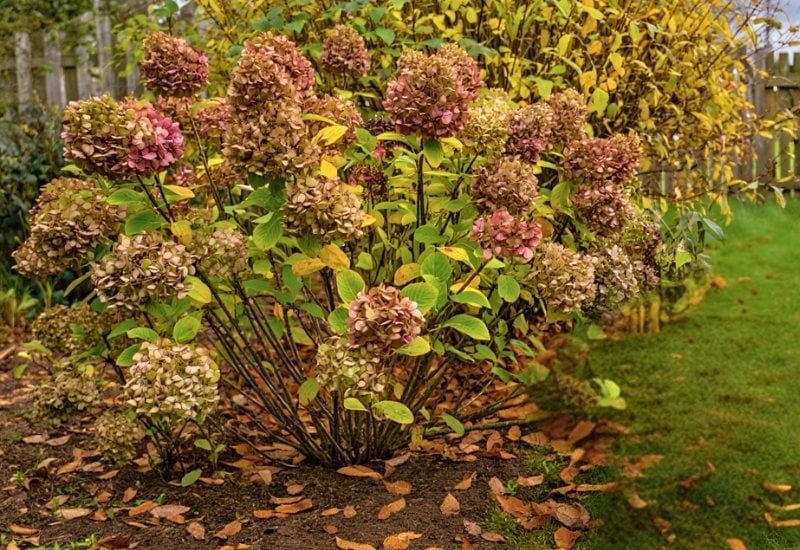
4: Wait To Deadhead Old Wood Types
 5")
If you’re growing Bigleaf (mophead), Lacecap, or Oakleaf hydrangeas, put the pruners down and step away from the shrub. I mean it. Back away slowly.
These varieties bloom on “old wood,” meaning the flower buds for this coming summer were set last autumn and are currently sitting dormant on those stems. Pruning them hard right now is the number one mistake gardeners make, and it will cost you an entire season of flowers. You’re effectively cutting off the display before it even starts.
Those brown, dried-up flower heads might look messy to you, but they’re actually performing a vital service by shielding the tender buds below them from wind and frost. Think of them as nature’s ugly little umbrellas.
 6")
Unless you live in a warm climate where winter is already a distant memory, the best strategy is patience. Wait until the danger of a freeze has passed and you see green growth starting to emerge. Then, and only then, you can simply deadhead by snipping the old bloom off just above the first set of healthy, plump buds.
Your future self – the one sipping lemonade in July surrounded by massive blue and pink blooms – will thank you for the restraint.
5: Adjust Soil pH (For Blue/Pink Varieties)
Want blue blooms instead of pink, or vice versa? February is your window.
 7")
First, let’s kill some myths. Pennies, rusty nails, and coffee grounds won’t reliably change your hydrangea color. Save your pocket change. The science is simpler than folk magic.
Color comes down to aluminum availability, controlled by soil pH. Acidic soil (below pH 6.0) makes aluminum available to roots, turning blooms blue. Alkaline soil (above pH 7.0) locks aluminum away, giving you pink. Purple means you’re in the middle.
For blue flowers, apply aluminum sulfate or a commercial “blueing” agent now. For pink, add garden lime. These amendments take time to break down, so late-winter application ensures the chemistry is right when buds form.
One more thing: This only works for Bigleaf hydrangeas (H. macrophylla) and Mountain hydrangeas (H. serrata). Your white ‘Annabelle’ or ‘Limelight’ will stay stubbornly white no matter how much aluminum sulfate you dump around their roots. Don’t waste your effort on the wrong varieties.
6: Check for Waterlogging
 8")
February is the month of soggy socks and squelching mud—and your hydrangea might be suffering more than your footwear.
Those shallow, fibrous roots that make hydrangeas so easy to transplant? They’re also incredibly vulnerable to rot when the ground stays cold and wet for weeks on end. While the plant looks dormant up top, below the surface it’s basically holding its breath, hoping the soil drains before the roots drown.
Low-lying areas, clay-heavy soil, spots where snow piles up and melts slowly—all prime candidates for waterlogging. Container hydrangeas are especially at risk if their drainage holes get blocked by ice or debris.
Stick your finger into the soil near the base. If it comes out smelling like a swamp and the earth clings in cold, heavy clumps, you’ve got a problem.
 9")
For in-ground plants, the fix is strategic. Dig a shallow trench to redirect water away, or mound up soil around the base to lift the root crown above the wet zone. Don’t bury the stems—just create a gentle slope so water moves past rather than pooling.
Potted hydrangeas are simpler. Tilt the pot slightly to let water run out, clear those drainage holes with a skewer, and if the soil is completely saturated, slip the root ball out and wrap it in newspaper overnight to draw out excess moisture before repotting in fresh mix.
2 Critical “What Not To Do” Mistakes
Here are the two mistakes that will cost you an entire summer of blooms if you get them wrong.
Do Not Apply Fertilizer
 10")
Your hydrangea is asleep. Its roots are barely functioning, and any fertilizer you apply now sits unused in cold soil. That nitrogen forces weak, tender growth that gets zapped by the next frost. Blackened shoots, wasted money, and a plant set back for months.
Worse, the excess doesn’t stay put. Spring rains wash it into waterways, or it builds up and burns delicate root hairs. You’re paying to harm your plant and pollute your neighborhood.
Wait until late spring when leaves are unfurling and roots are actively growing. If you need to feel productive now, spread compost. That’s it.
Water Carefully
Late winter watering is rarely necessary, but dry spells happen. If your soil feels dusty and parched several inches down, your hydrangea might need a drink.
The danger here is overdoing it. Cold, wet roots rot fast. Before you haul out the hose, stick your finger into the soil or use a moisture meter to check below the surface. If it’s still damp, step away. Dormant plants use almost no water, and winter precipitation usually covers their minimal needs.
When you do water, aim for morning so any excess can drain before temperatures drop at night. Saturated soil that freezes is a recipe for root damage.

Written By
Amber Noyes
Amber Noyes was born and raised in a suburban California town, San Mateo. She holds a master’s degree in horticulture from the University of California as well as a BS in Biology from the University of San Francisco. With experience working on an organic farm, water conservation research, farmers’ markets, and plant nursery, she understands what makes plants thrive and how we can better understand the connection between microclimate and plant health. When she’s not on the land, Amber loves informing people of new ideas/things related to gardening, especially organic gardening, houseplants, and growing plants in a small space.