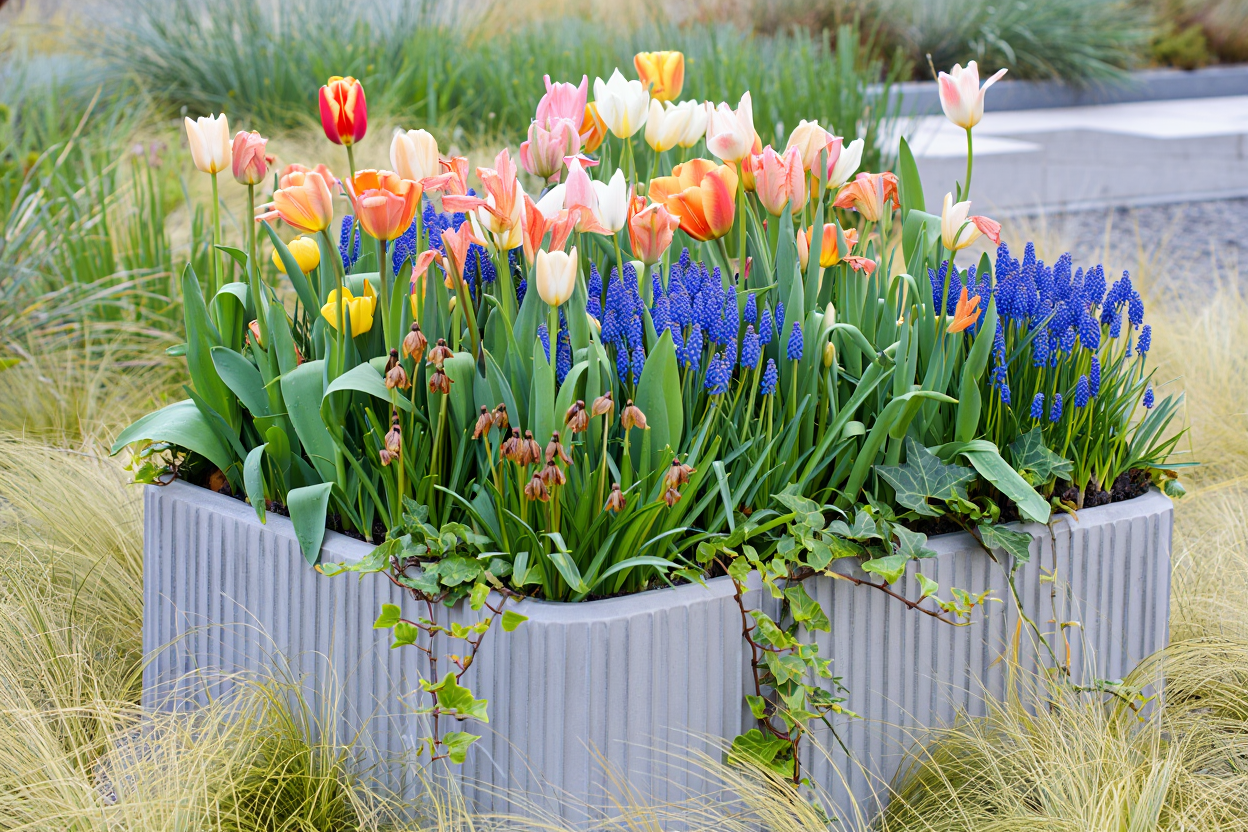
Every gardener I know hits that same November moment — the borders are fading fast, the days are short, and everything looks a bit… finished. But if you’ve still got a few empty pots and ten spare minutes, you can quietly plant something that will reward you months later. That’s where the bulb lasagne comes in.
It’s an old gardener’s trick and one of the simplest ways to stretch color right through spring. By layering bulbs in a single pot — tulips deep down, daffodils and hyacinths in the middle, and crocuses or dwarf iris near the surface — you create a living timepiece that wakes up in stages. Just when you think the show is over, another layer pushes through.
I’ve been doing it for years, especially in pots by the kitchen door where I can see them on gray mornings. Those first shoots in February feel like a small victory against winter. By April, the whole pot is bursting with tulips and scent, and I always think, “That half hour I spent in fall was worth it.”
So if your garden looks dull right now, don’t pack everything away. Grab a bag of compost, a few bulbs, and a deep pot — I’ll show you how to build a bulb lasagne that keeps blooming for months.
What Is a Bulb Lasagne?
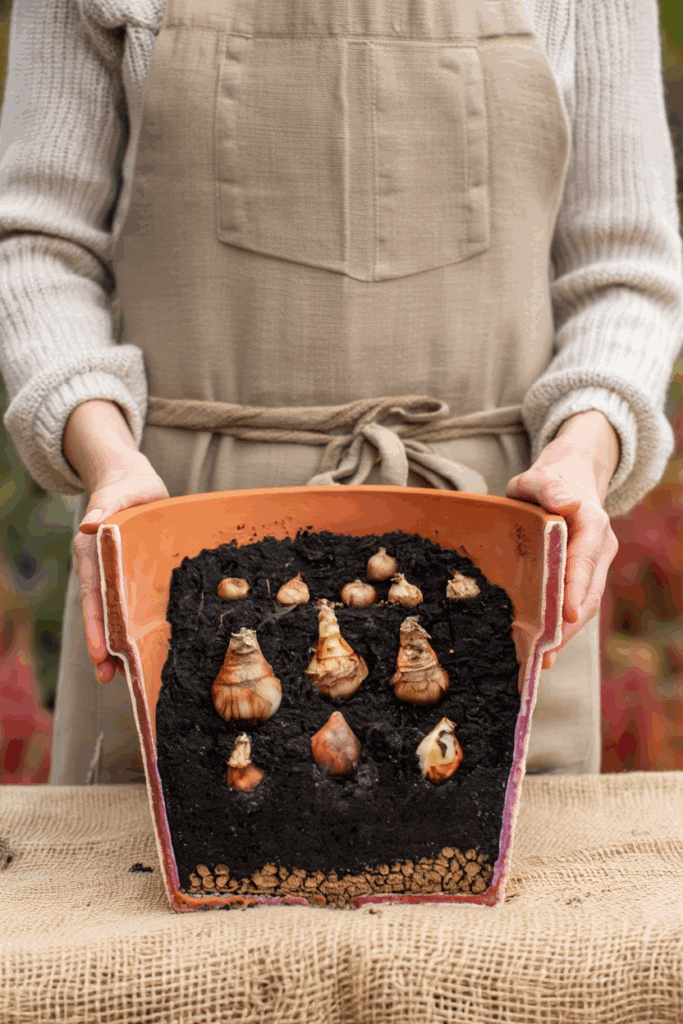
If you’ve ever wished your spring pots could stay in bloom for months instead of weeks, here’s the secret: make a bulb lasagne. It’s exactly what it sounds like — layers upon layers of bulbs, stacked in one pot just like a lasagne, so something beautiful is always coming up.
The biggest bulbs, like tulips or daffodils, go in first at the bottom. Then you add a middle layer, maybe hyacinths or miniature narcissus, and finish with small early bloomers like crocuses or snowdrops right on top. As the season unfolds, each layer takes its turn — first the little ones, then the mid-season blooms, and finally the big show-stoppers.
You can mix bulbs that flower all at once for a full, overflowing display, or plan them by bloom time for color that just keeps going. Either way, it’s one of the easiest (and most satisfying) gardening tricks for getting months of flowers from a single pot.
The Advantages of a Bulb Lasagne
There are so many reasons to give a bulb lasagne a try, and once you’ve made one, it’s easy to see why gardeners love them. The biggest advantage is how much color you can squeeze out of a single pot. By layering bulbs that flower at different times — maybe crocuses on top, tulips in the middle, and daffodils below — you’ll have a steady stream of blooms that carry you from the first hints of spring right into early summer. It’s a clever, space-saving trick that keeps the show going long after most containers have faded.
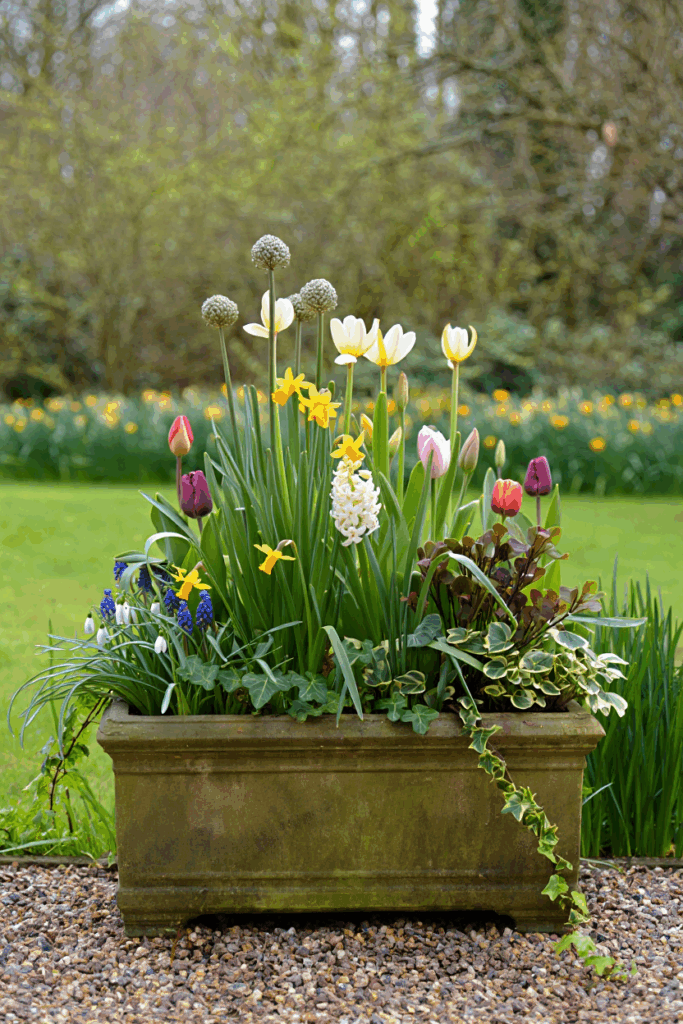
You can also use this method to create beautiful color blends. Some gardeners prefer to group bulbs that bloom together so the pot explodes with coordinated shades all at once. Picture a mix of early tulips like Monsella, Verona, Abba, and Monte Carlo — a cheerful blend of yellow, cream, and red that brightens even the grayest days.
Another thing to love about layered planting is the variety of shapes and forms it brings. Tall, cup-shaped flowers mingling with shorter, starry ones make the whole display feel more natural and alive. Plus, the mix attracts plenty of pollinators who benefit from having different types of blooms to feed on when little else is available.
And maybe best of all, bulb lasagnes are just fun to put together. There’s something deeply satisfying about stacking the layers, tucking in the bulbs, and imagining how each one will rise in its own time. Since autumn — roughly September through November — is the ideal season to plant, this is the moment to roll up your sleeves and “bake” your own bulb lasagne. Just keep a few simple tips in mind to help it turn out perfectly.
How to Plant a Bulb Lasagne
Step 1 – Choose the Right Container
The success of a bulb lasagne starts with the pot. Choose one that’s deep and wide enough to hold several layers of bulbs without crowding. Ideally, aim for at least 12 inches deep and 12–14 inches across. This gives the bulbs sufficient vertical distance for layering and lateral room for root spread.
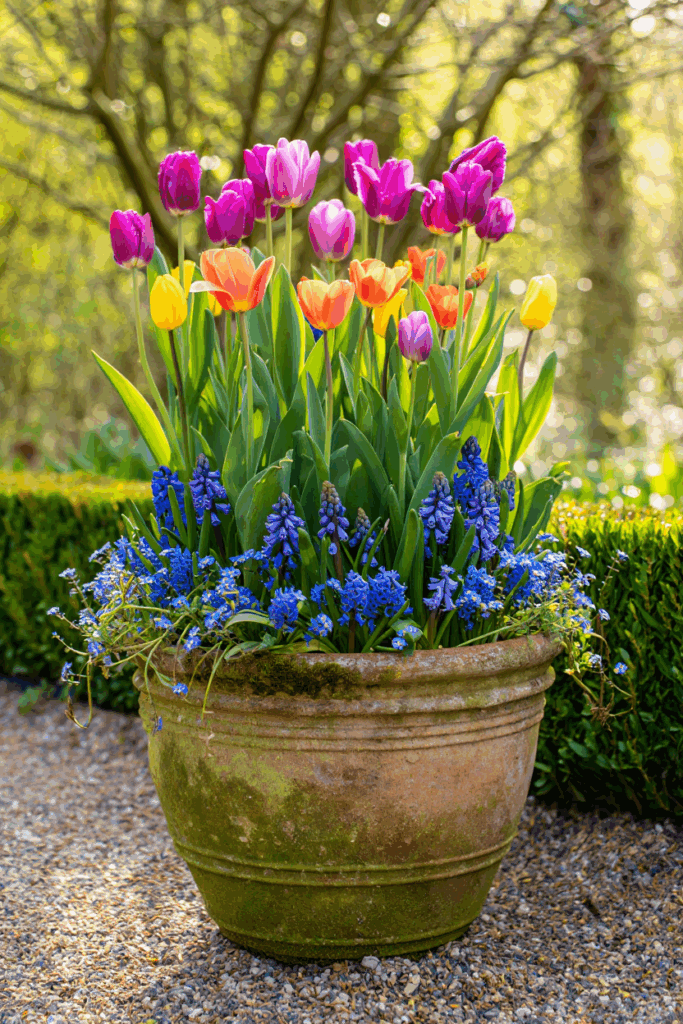
Terracotta pots are the gold standard because they’re porous, allowing air circulation and natural evaporation. This keeps compost fresher and discourages fungal growth. Glazed ceramic or heavy-duty plastic pots can work too, but they trap more moisture — so drainage becomes even more critical.
Before filling, check that your pot has at least one drainage hole at the base. If it doesn’t, drill one or pick a different container. Then cover the hole with a piece of broken pot, a stone, or mesh — this prevents compost from compacting and blocking the outlet. Finally, raise the pot slightly off the ground using feet or bricks. Elevating it improves airflow underneath and helps water drain freely during winter rains.
Step 3 – Add a Base Layer of Compost
Before adding any bulbs, fill the bottom of your pot with 2–3 inches of compost mix. This provides insulation, moisture regulation, and a stable foundation for the lowest bulbs. Level the surface gently with your hand, but avoid firming it down too much — compressed compost reduces drainage and root oxygen.
Step 2: Prepare the Compost Mix
The biggest reason bulb containers fail is poor drainage. Bulbs are storage organs full of starch and water; they rot easily if oxygen can’t reach their base. That’s why the potting mix must be moisture-retentive but free-draining.
Use a peat-free, multi-purpose compost mixed with coarse grit, perlite, or sharp sand. A 3:1 ratio (three parts compost to one part grit) provides the ideal balance. The grit increases porosity and reduces compaction, keeping the soil “open” for roots and air exchange.
For extra structure and fertility, you can blend in:
- A small amount of loam-based compost (for weight and nutrient buffering)
- A handful of organic bulb fertilizer, bone meal, or slow-release granules mixed through the lower half
Never use heavy garden soil in pots — it compacts quickly, suffocating roots and bulbs alike.
Step 4 – Plant the Deepest Layer (Late Bloomers)
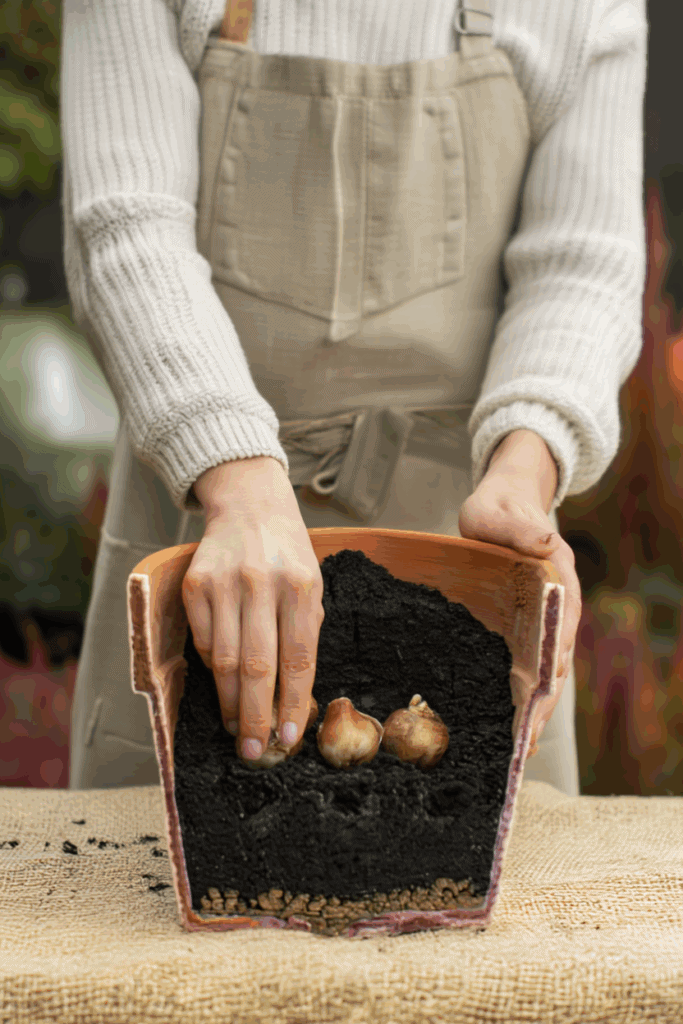
Your first layer should always be the latest and largest bulbs — tulips, alliums, or large narcissi. These bulbs require about 5–6 inches of soil above their tips to bloom strongly, so they belong at the very bottom.
Arrange them pointy-end up, leaving about half an inch of space between bulbs (they’ll grow closer than in the ground but still need airflow). Position them in a staggered pattern rather than a grid — this prevents the shoots from stacking directly above each other in upper layers.
Once placed, cover the bulbs with enough compost to bury them completely and restore a level surface.
Tip: When layering tulips, plant them deeper than usual (7–8 inches total). The extra depth keeps them cooler in winter, reducing the risk of frost damage and helping prevent “tulip fire,” a fungal disease favored by fluctuating temperatures.
Step 5 – Add the Middle Layer (Mid-Spring Bloomers)
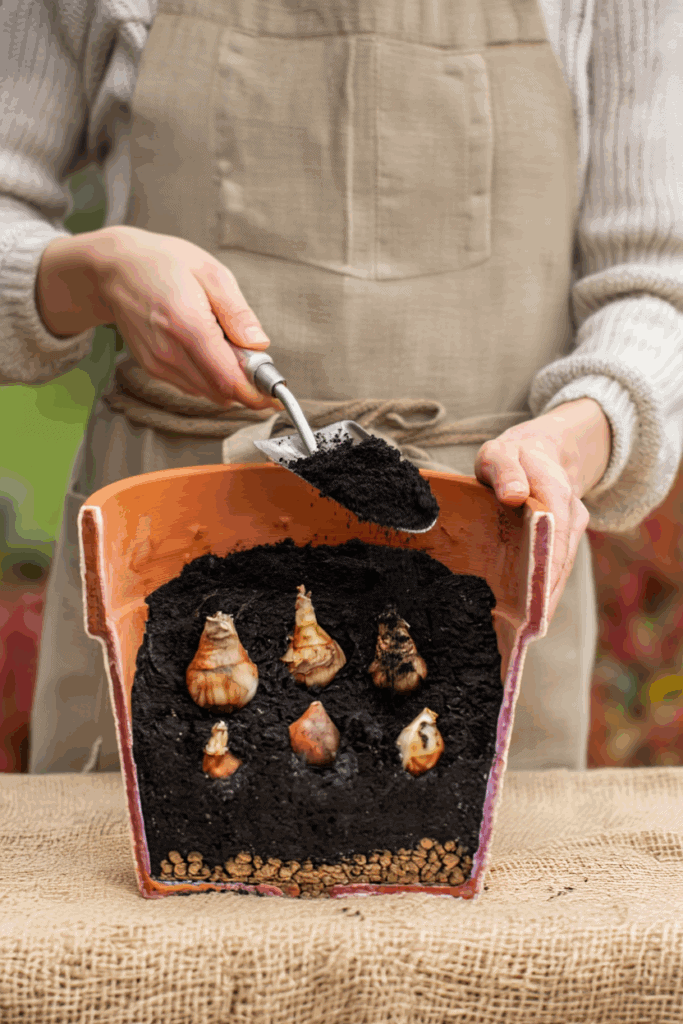
Next, plant your mid-season bulbs, typically hyacinths, muscari (grape hyacinths), small narcissi, or Dutch iris. These should sit about 3–4 inches deep.
Again, stagger them above the bulbs below and space them evenly so roots and shoots won’t compete directly. Hyacinths and narcissi have thick, fleshy leaves, so they benefit from being slightly deeper to prevent shading out smaller bulbs later on.
Add more compost until this second layer is covered, gently patting the surface to remove large air gaps.
Step 6 – Add the Top Layer (Early Bloomers)
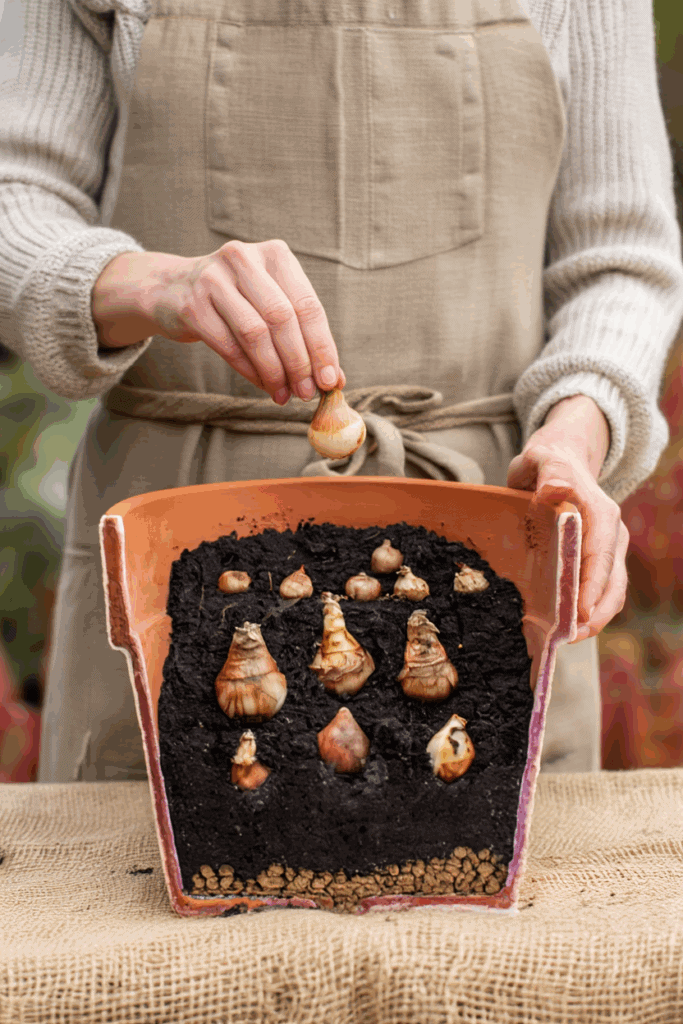
Finally, place your earliest bulbs near the surface — crocuses, scilla, snowdrops, dwarf iris (Iris reticulata), or small anemones. These thrive with just 2 inches of compost above their tops.
This top tier delivers the first splash of color, often when the garden still feels bare in late winter. Because these bulbs are smaller, you can pack them closer together — roughly an inch apart.
Fill the remaining space in the pot with compost until you’re about one inch below the rim. This headspace leaves room for watering and prevents compost from spilling over when you water or during heavy rain.
Step 7: Add a Decorative and Protective Top
Spread a thin layer of alpine gravel or horticultural grit across the top. This neatens the surface, helps retain moisture, and stops soil from splashing when it rains. It also discourages weeds and curious squirrels from digging up your bulbs.
Step 8: Water Thoroughly
Give the whole pot a good soak to settle the compost around the bulbs and remove air gaps. After that, water sparingly — just enough to keep the compost slightly moist. Through autumn and winter, rainfall usually provides all the moisture they need. The key is to avoid soggy conditions, which can rot bulbs before they ever get the chance to sprout.
Step 9: Place and Overwinter
Position your container in a bright but sheltered spot — somewhere that gets light but isn’t constantly drenched by heavy rain. In mild climates, you can leave it outside all winter. If you live in a region that regularly dips below freezing, move it into an unheated shed, porch, or greenhouse until the worst of the cold passes. Remember: bulbs in pots experience lower temperatures than those in the ground, so a bit of protection can make all the difference.
But where do the different bulb varieties go? In which layer?
Bulb Varieties for the 3 Layers of Lasagna Planting
Starting from the bottom layer, here is a list of bulbous (cormous and tuberous) perennials that go in the three different layers:
Deep Layer (6 to 8 inches or 15 to 20 cm)
- Tulip (late varieties) (Tulipa spp.)
- Allium giganteum (Allium giganteum)
- Allium aflatunense (Allium aflatunense)
- Daffodil (large trumpet types) (Narcissus spp.)
- Crown Imperial (Fritillaria imperialis)
- Camassia quamash (Camassia quamash)
- Lily (Lilium spp.)
- Eremurus (Eremurus robustus)
- Foxtail Lily (Eremurus spp.)
- Giant Snowflake (Leucojum vernum)
- Tulipa darwin hybrid (Darwin Hybrid Tulip)
- Tulipa triumph (Triumph Tulip)
- Tulipa parrot (Parrot Tulip)
- Tulipa fringed (Fringed Tulip)
- Ornamental Onion (Allium cristophii)
- Giant Crocosmia (Crocosmia masoniorum)
- Lily-flowered Tulip (Tulipa acuminata)
- Narcissus ‘Mount Hood’ (Narcissus ‘Mount Hood’)
- Allium ‘Globemaster’ (Allium ‘Globemaster’)
- Martagon Lily (Lilium martagon)
Middle Layer (4 to 6 inches, or 10 to 15 cm)
- Hyacinth (Hyacinthus orientalis)
- Daffodil (Narcissus spp.)
- Tulip (early varieties) (Tulipa spp.)
- Fritillaria meleagris (Fritillaria meleagris)
- Leucojum aestivum (Leucojum aestivum)
- Spanish Bluebell (Hyacinthoides hispanica)
- Camassia leichtlinii (Camassia leichtlinii)
- Scilla campanulata (Scilla campanulata)
- Star of Bethlehem (Ornithogalum umbellatum)
- Dutch Iris (Iris × hollandica)
- Triteleia laxa (Triteleia laxa)
- Narcissus (Narcissus spp.), most varieties.
- Tulipa greigii (Greigii Tulip)
- Tulipa kaufmanniana (Waterlily Tulip)
- Allium moly (Allium moly)
- Anemone coronaria (Anemone coronaria)
- Brodiaea (Brodiaea spp.)
- Tulipa fosteriana (Fosteriana Tulip)
- Fritillaria uva-vulpis (Fritillaria uva-vulpis)
Top Layer (less than 4 inches, or 10 cm)
- Snowdrop (Galanthus nivalis)
- Crocus (Crocus spp.)
- Glory-of-the-Snow (Chionodoxa luciliae)
- Siberian Squill (Scilla siberica)
- Grape Hyacinth (Muscari armeniacum)
- Anemone Blanda (Anemone blanda)
- Dwarf Iris (Iris reticulata)
- Winter Aconite (Eranthis hyemalis)
- Spring Starflower (Ipheion uniflorum)
- Puschkinia (Puschkinia scilloides var. libanotica)
- Striped Squill (Puschkinia scilloides)
- Dwarf Daffodil (Narcissus ‘Tête-à-tête’)
- Scilla mischtschenkoana (Scilla mischtschenkoana)
- Grecian Windflower (Anemone blanda ‘Blue Shades’)
- Iris ‘Katharine Hodgkin’ (Iris histrioides)
- Fritillaria michailovskyi (Fritillaria michailovskyi)
- Blue-eyed Grass (Sisyrinchium angustifolium)
- Dutch Crocus (Crocus vernus)
- Tommasini’s Crocus (Crocus tommasinianus)
- Rock Garden Tulip (Tulipa tarda)
This is a fairly comprehensive list of the most common bulbous perennials, of course, there are thousands, and, in case you want to grow some rare variety, do check the planting depth.
It’s Time for Lasagna and Many More Blooms Now!
Bulb layering is a simple but very useful technique – now you have all the information you need, you can stop wasting space in your garden and get many more flowers.

Written By
Amber Noyes
Amber Noyes was born and raised in a suburban California town, San Mateo. She holds a master’s degree in horticulture from the University of California as well as a BS in Biology from the University of San Francisco. With experience working on an organic farm, water conservation research, farmers’ markets, and plant nursery, she understands what makes plants thrive and how we can better understand the connection between microclimate and plant health. When she’s not on the land, Amber loves informing people of new ideas/things related to gardening, especially organic gardening, houseplants, and growing plants in a small space.
