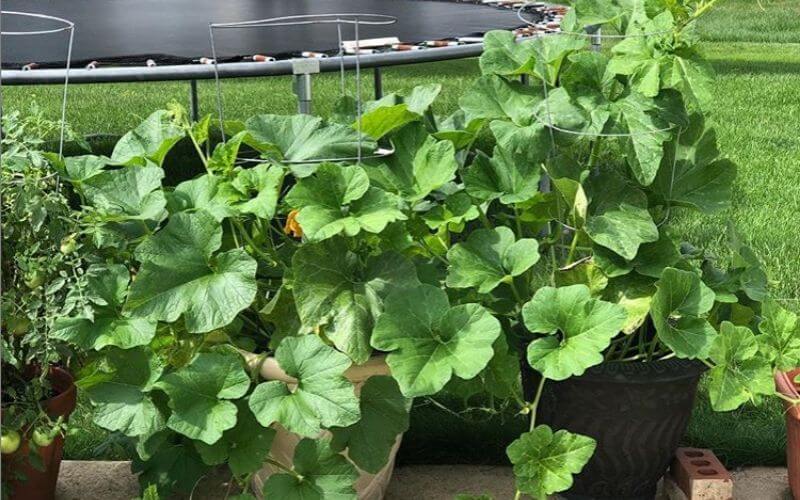
Are you surprised to learn that growing pumpkins in containers is a real thing? That’s right! If you have the proper sized container, there is no reason why you cannot grow pumpkins in pots right on your patio.
Most of us associate pumpkins with the fall season when pumpkins surround us as decoration and as part of dinner recipes.
Growing pumpkins in pots isn’t difficult; it’s downright easy compared to other vegetables, adapting to a multitude of climates and locations.
Here’s how to create a perfect organic pumpkin container garden and maximize your harvest:
Everyone should try growing pumpkins at least once! It’s fun to watch these large orange fruits grow larger each day; kids thoroughly enjoy growing pumpkins in their gardens.
No matter where you garden, whether you have a backyard in suburbia or a small patio in the middle of the city, you can grow pumpkins in pots.
From selecting the right container to the proper soil blend, we put together everything that you need to know about growing pumpkins in containers. We promise – this is easy.
How to Grow Pumpkins in Containers
Once you decide that you want to try growing pumpkins in pots, here are the steps you need to follow. They’re so easy.
1: Know When To Plant Pumpkins
Pumpkins are not frost-friendly, so they need to be planted in container when the temperature is above 65℉. Depending on where you live, that means they can be planted between April and late May in most USDA zones.
If you live in a warmer climate that doesn’t frost, you can plant in July for a later harvest closer to October or November.
Those who live in subtropical or tropical climates can grow pumpkins year-round.
2: Get The Right Sized Container For Your Pumpkin Plants
The most important part of growing pumpkins in containers is selecting the right sized pot. If you don’t get the right size, your plant will die; it needs plenty of space for the roots to spread out, letting the plant grow.
The ideal size for a pot is 10 gallons for smaller pumpkin varieties. If you want to grow larger cultivars, such as the pumpkins ideal for making jack-o-lanterns, then you would want an even larger pot, typically 15-25 gallon pots.
The pots should be 20-24 inches deep with the same width to be able to accommodate growing pumpkins. Some gardeners have success growing pumpkins in plastic children’s swimming pools that are 6-foot wide. That’s unique and inexpensive!
Also, make sure the containers have adequate drainage. Pumpkins don’t like standing water, so make sure the bottom of the pot you select has plenty of holes to let the water drain out. If the containers don’t have holes, you often can use a drill to put the holes into it.
3: Position The Pot So That It Gets 4-6 Hours Of Sun Each Day
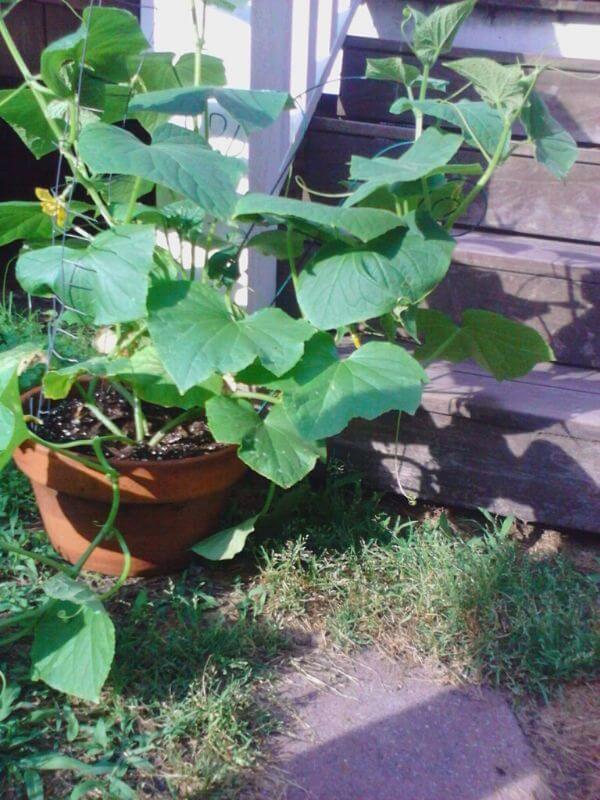
These containers are LARGE, and once filled with soil and a large plant, you don’t want to try to move it.
You need to find the best location for pumpkin plants before you start to grow it.
Pumpkins need the sunniest location on your patio that you can find, even if you’re growing a small pumpkin cultivar.
These plants need to receive at least six hours of sunlight each day. If you try to grow your plants in an area with too much shade, the plant’s overall growth will slow, and the plant might retain too much moisture, leading to mildew.
4: Get The Soil Ready To Plant Pumpkin Pots
Start with a bagged soilless mix that is recommended for container growth. These blends are meant to help the plants retain moisture and the nutrients needed.
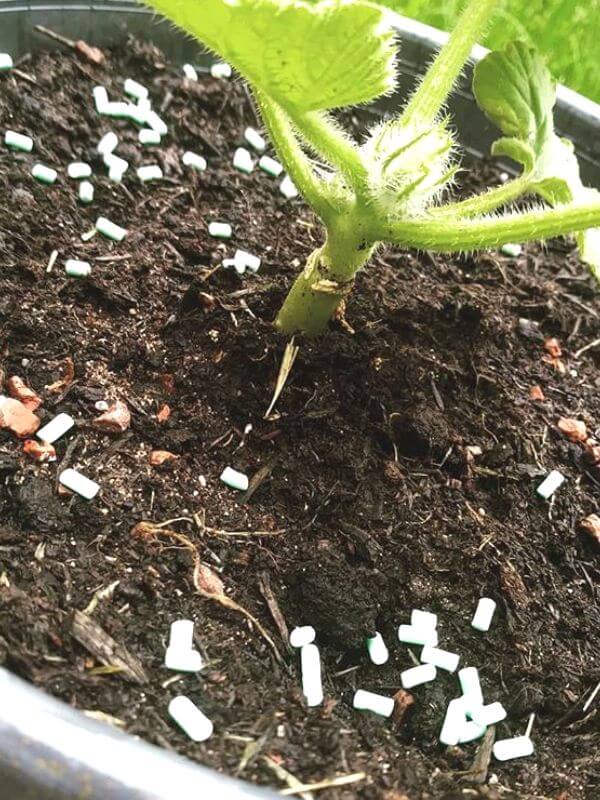
Pumpkins reach some massive sizes, so you can guess that they’re heavy feeders. These plants need a lot of nutrients, so having soil with high humus content is crucial. That’s why you need to use a potting soil that you enriched with compost. The compost also retains water.
Don’t worry about adding too much compost or manure; you’ll need plenty for pumpkins. Mix it in your soil before planting, then plant to put more compost on the top of the soil after planting.
Be sure to check the soil pH range in your container. Pumpkins prefer a range between 6 to 7.2.
5: Plant The Pumpkin Seeds Or Seedlings In Containers
In most cases, it’s better to plant the seeds directly in the pots rather than transplanting seedlings you started inside because pumpkins become root-bound quickly. If you buy seedlings at a nursery, be sure to transfer them promptly to avoid any transplant shock.
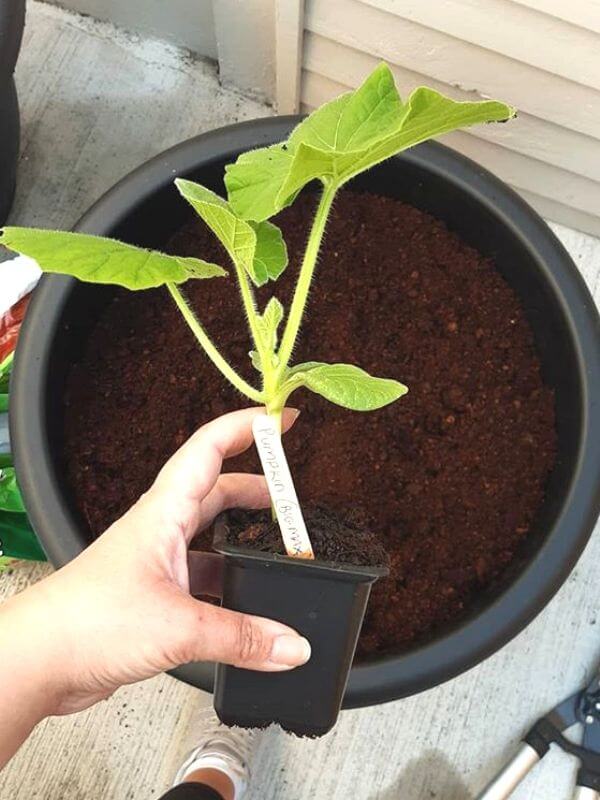
If you do so the seeds indoors, try using biodegradable pots. This makes transplanting seedlings easier because you don’t need to disturb the roots.
Sow 3 or 4 seeds per pot, then thin it down to one or two, depending on size, when the second true set of leaves develops.
Whether you keep one or two seedlings will depend on the size of the container you selected.
Plant each seed 1-2 inches deep into the soil. If you plant them any deeper, it can make it harder for them to emerge from the dirt. It typically takes 5-10 days for the seeds to germinate.
6: Create A Support System
Consider the overall size of these plants; you do need to install a robust and large trellis that can support the pumpkin vines. You typically don’t want to allow the vines to grow along the ground or your patio because it can introduce bacteria to your plant.
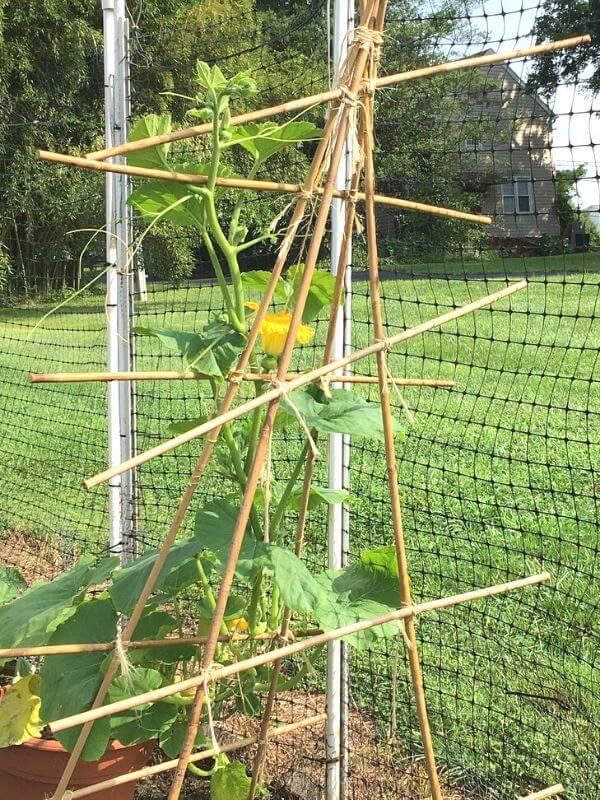
Most gardeners have success using an A-shape trellis to support pumpkin vines. Trellis need to stay away from walls to help avoid the plant contracting any diseases as well.
As your plant grows, you’ll need to train the vines to grow up the support system. That’s much easier than it might sound.
All you need to do is carefully move the tendrils around the trellis as they grow. The tendrils naturally latch onto whatever is nearby to assist with growth.
As the fruits develop, you’ll need to make slings to hold them. Otherwise, they’ll hang down and potentially snap the vines. Many gardeners use pantyhose as a sling under the fruit and attached to the trellis.
How to Care for Pumpkins Growing in Pots
Your pumpkin plants are happily growing in their containers, but now you need to keep them happy. Here is how to take care of pumpkin plants growing in containers.
7: Watering Frequently Is A Must
One thing that you have to do is water your plants often. Just like melons or gourds, you need to water pumpkins often. Pumpkins love moist soil, so water deeply and regularly. Each plant needs one inch of water per week.
At the same time, you need to make sure you’re watering at the base level and not getting water on the foliage of the plant.
8: Mulch Around Your Plants
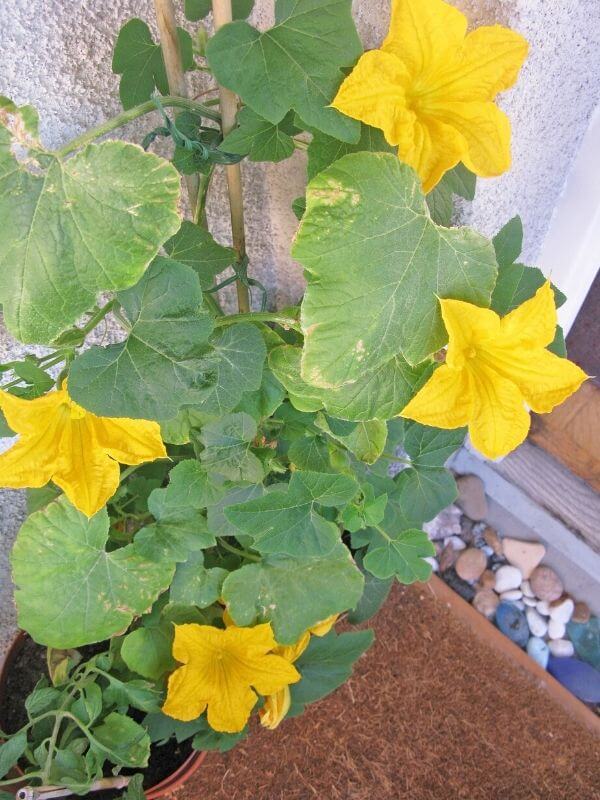
Mulching around your pumpkin plants is a fantastic idea. Do so when your plants are a few inches tall; you don’t want to cover the pumpkin plant with mulch accidentally.
Mulching helps pumpkin plants grow because it slows the rate of water evaporation out of the soil, retaining more moisture.
It also can water the soil temperature in late spring as well as keep soil temperatures a bit cooler in the summer.
9: Remember That Fertilizing Is A Must
As mentioned before, pumpkins are heavy feeders, and if you want to have a decent harvest, expect to apply a lot of fertilizers.
First, you need to start with rich, fertile soil for larger pumpkins. If you followed the recommendations to use plenty of compost in the container, then you covered this step appropriately during planting.
As your plant continues to get larger, you’ll want to use a balanced fertilizer in the early stages of growth.
Then, as it grows, you’ll want to reduce the amount of nitrogen used on your plant, switching to a 5-15-15 fertilizer that is rich in potassium and phosphorus with lower nitrogen.
Use 5-15-15 fertilizer every other week. You’ll know that it’s time to use this fertilizer when the plant is large and produces flowers.
10: You Might Need To Hand Pollinate The Flowers
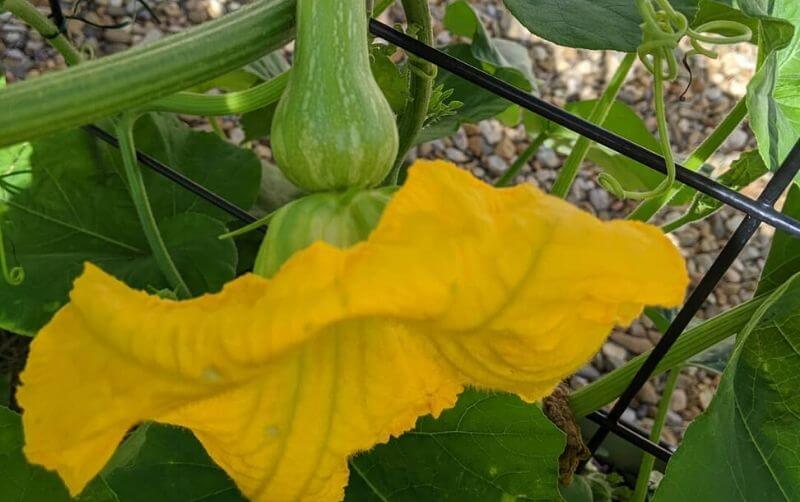
Pollination is essential if you want to gain fruit from your plants. Bees and other pollinators are necessary, but if you notice that the flowers are not being pollinated, you might need to do so by hand.
The female flowers will have an ovary, or the start of a pumpkin, at the base of the flower, and they appear a few days after the male flowers. The male flowers have the pollen needed to pollinate the female flowers.
If you need to hand pollinate the flowers, take a cotton swab, and gently move it around inside of the male flower, collecting pollen. Then, move that pollen and rub the swab inside of the female flower.
Yes, you just played the role of the birds and bees, garden style!
Handling Pests and Diseases
Pumpkin plants can fall victim to a variety of pests and diseases. Here are a few that you might encounter as your plants grow throughout the year.
1: Squash Mosaic
The symptoms of squash mosaic might vary, but it typically starts with mottled leaves, blisters, and ring spots. The infected plants usually have stunted growth, and the fruits might be malformed. Squash mosaic is a virus that is transmitted through infected seeds and spread by cucumber beetles.
The only way to manage this virus is by using certified disease-free seeds. Try to decrease the risk of cucumber beetles visiting by keeping your garden beds clear of debris.
2: Phytophthora Blight
If you notice the sudden and permanent wilting of your plant, but the leaves don’t change color, you might have phytophthora blight.
Unfortunately, the plant typically dies within a few days. The roots and stem that are close to the soil tend to be discolored, and it’ll be easily removed from the ground.
There is no treatment for this disease that emerges in warm, moist conditions. The best thing to do is to avoid saturated soil and avoid watering for long periods.
3: Aphids
Aphids are small, soft-bodied insects that like to stick to the underside of leaves or the stem of plants. If the infestation becomes too heavy, it can cause the leaves to be yellow.
Aphids secrete a sticky substance that can encourage the growth of mold on the plants, and the leaves might develop necrotic spots on the leaves or stunted shoots.
You can knock off the aphids from the leaves with some water from a hose. Insecticides are typically only used to treat severe infestations.
You also can try insecticidal soap or oil, such as neem oil, to control the population.
4: Cucumber Beetles
If you have stunted seedlings or damaged leaves, you might have a cucumber beetle problem. The plant might exhibit symptoms of bacterial wilt and scar on the fruit caused by the beetles.
These beetles can overwinter in the soil and leaf debris left at the end of the season, emerging from the soil when the temperatures are warm.
Watch signs for beetles on your plants. You can use floating row covers to protect your plants from these pests and to protect your plants from the damage.
Another trick is to try applications of kaolin clay to manage small populations.
5: Squash Bug
An infestation of squash bugs can cause leaves to turn yellow and brown, and the plant may start to wilt. These pests can also cause blemished fruits and the death of fruit.
Squash bugs are grey-black with orange and black stripes on their abdomen. These bugs like to overwinter in debris left under the plants and rocks.
You should get rid of all crop debris and residue after harvesting. Use row covers when you plant because they protect your plants from the pests, and you also can try insecticidal soaps and oils.
Harvesting Container Grown Pumpkins
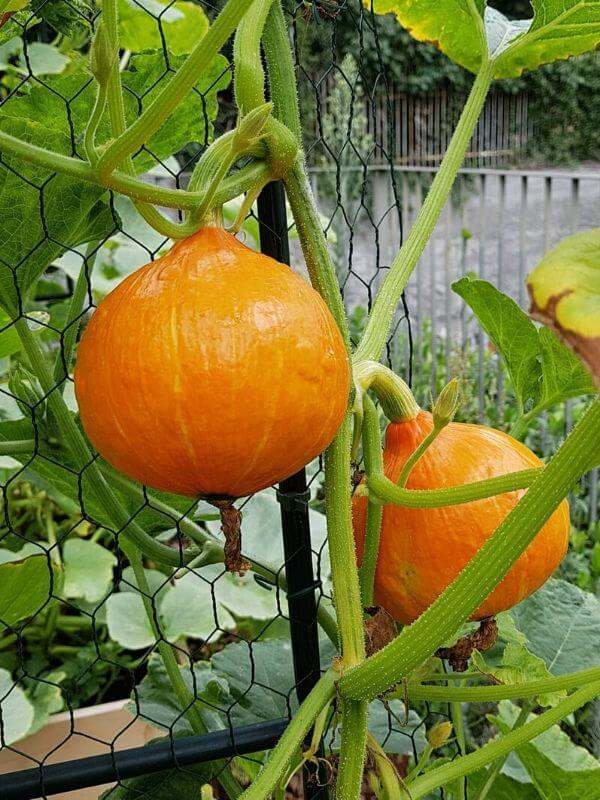
After 90-120 days (depending on the variety of pumpkin that you grow), it’s time to harvest your pumpkins. This is the time that you’ve been patiently waiting to arrive.
First, you have to be sure your pumpkins are matured and ready for harvesting. One way to determine maturity is to take your fingernail and press it into the pumpkin rind.
A mature pumpkin will resist the pressure. You can knock on the pumpkin; it should sound hollow, which is a sign that it’s time to pick the fruit.
Now, it’s time to pick your pumpkin. What you don’t want to do is yank or pull the fruit off of the vine. As you might guess, that can snap the vine, which will damage any other fruits growing on the vines.
Instead, use a pair of pruning shears or a sharp knife. Leave a long stem that measures around 10cm and use the shears or knives to cut the vine.
Storing Pumpkins
One of the remarkable things about pumpkins is that you can harvest and store them for months. Our ancestors commonly grew pumpkins because of their ability to last for so long in root cellars or attics.
For proper storage, you need a dry, cold, and dark location, such as a basement, root cellar, or pantry, to store your pumpkins. Pumpkins can store for up to five months in these locations under the right conditions.
The Best Pumpkin Varieties for Container Gardening
When you’re growing pumpkins in pots, it’s typically best to select smaller pumpkins that yield fruits that weigh 2 to 5 lbs and measure 6-10 inches across. These pumpkins, as well as miniature pumpkins, do well in pots.
Here are a few varieties to consider.
Bushkin
This is a compact, bush-type vining pumpkin, perfect for containers or small gardens because the vines only reach 5-6 feet long. These pumpkins are great for pies or carving, weighing up to 10 pounds.
Baby Bear
This pumpkin variety takes around 105 days to mature, reaching half of the size of a normal pumpkin. Baby bear pumpkins are great for baking pies! They usually measure 5-6 inches wide and weigh up to 2lbs.
Baby Boo
Here is a creamy, white, miniature pumpkin that typically measures 2-3 inches in diameter. The flesh is edible, and when it’s fully ripe, the color turns pale yellow. That’s why this variety is best harvested before complete maturity.
Small Sugar
Often called the New England Pie, this variety takes up to 105 days to mature. It’s an awesome tasting pie pumpkin that reaches 5-8 pounds. Small sugar pumpkins are mostly grown for kitchen uses, such as baking and canning. It is a pre-Civil War heirloom pumpkin.
Jack Be Little
If you want to grow some miniature pumpkins for ornamental decoration, Jack Be Little is a great choice, and they’re edible as well. The pumpkins reach a mature weight around 8 ounces, and they store for 8-12 weeks after harvesting.
Try Growing Pumpkins
You might not have realized that growing pumpkins in containers was possible, but it is! If you get a large enough container and remember to water frequently, you can have homegrown pumpkins this fall. Nothing is more delicious than pumpkin pie baked from pumpkins that you grew!

Written By
Amber Noyes
Amber Noyes was born and raised in a suburban California town, San Mateo. She holds a master’s degree in horticulture from the University of California as well as a BS in Biology from the University of San Francisco. With experience working on an organic farm, water conservation research, farmers’ markets, and plant nursery, she understands what makes plants thrive and how we can better understand the connection between microclimate and plant health. When she’s not on the land, Amber loves informing people of new ideas/things related to gardening, especially organic gardening, houseplants, and growing plants in a small space.

I just happened to find you when I asked about growing pumpkins in containers. I had some mini pumpkins I left to decompose and now they have started to sprout from the seeds in some barrel containers I have. I have pulled them out and put them in smaller cell packs to put in some larger black plastic containers once they are big enough. I would love some ideas I can do that may look good as well where they can grow. Thanks for any ideas you may have for me. I’m kind of excited to try this little project out as these mini pumpkins are kind of spendy but so cute and would be fun to share if I have enough fro growing them! Thanks Amber!!
I did pumpkins successfully in a square foot garden. The jack o lanterns were planted in a 3×12 bed amongst densely planted corn and bush beans. The pie pumpkins and minis were planted 1/sq ft and grew directly up a trellis I made for them. They did really well, despite the fact that I never watered/fertilized them.
Thanks ,we live in Western Australia now,very hot summers,thanks for the information
Question:
Started Pumpkin seeds indoors.
How big of a pot for a Sugar Pie Pumpkin. From your article, I am guessing a 10 gallon pot is sufficient and for a Dickson Pumpkin perhaps 25 gallon pot?
Please confirm. Thanks.
The bigger is better.