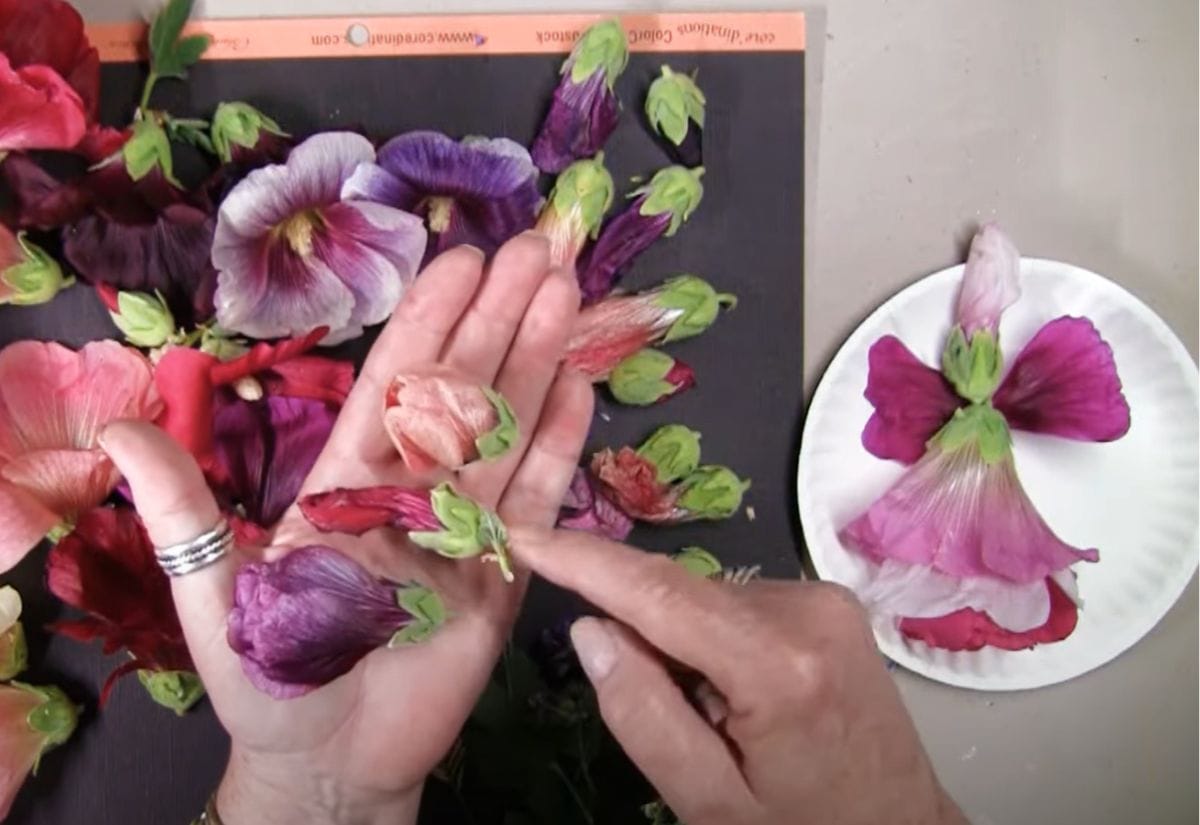
Growing up, there was always a touch of magic in crafting my own toys. One timeless creation that held a special place in my heart is the old-fashioned Hollyhock Doll. These charming dolls, made from the blooms of the hollyhock plant, have been a beloved craft for generations.
Hollyhock dolls are not just whimsical playthings; they carry with them a rich history and tradition. In folklore, hollyhocks symbolize ambition and fruitfulness. The process of carefully selecting the perfect flowers and delicately fashioning them into a doll is a ritual filled with patience and creativity.
There’s a sense of nostalgia and simplicity in creating these dolls that resonates with many of us. The act of disconnecting from the digital world and immersing oneself in a hands-on craft like making a Hollyhock Doll can be a soothing balm for the soul.
Join me on this journey back in time as we explore the art of making old-fashioned Hollyhock Dolls. Let’s delve into the step-by-step process, uncovering the joy and satisfaction that comes from crafting something beautiful with your own hands.
Materials Needed:
- Several Hollyhock flowers and buds as well as rosemary sprigs or plant stems.
- Carrot, apple, or radish for the stand. You just need a tiny piece you might normally throw away.
- Food safe markers in red or pink for the lips and black or blue for the eyes.
- Extra long toothpicks or something similar in size. Skewers are too large around and will tear the flower.
- A large pin or needle to poke holes in the flowers.
- Scissors (not shown).
- Thin cotton towels or paper towels or napkins.
- A medium size bowl.
Step 1: Gather Your Flowers
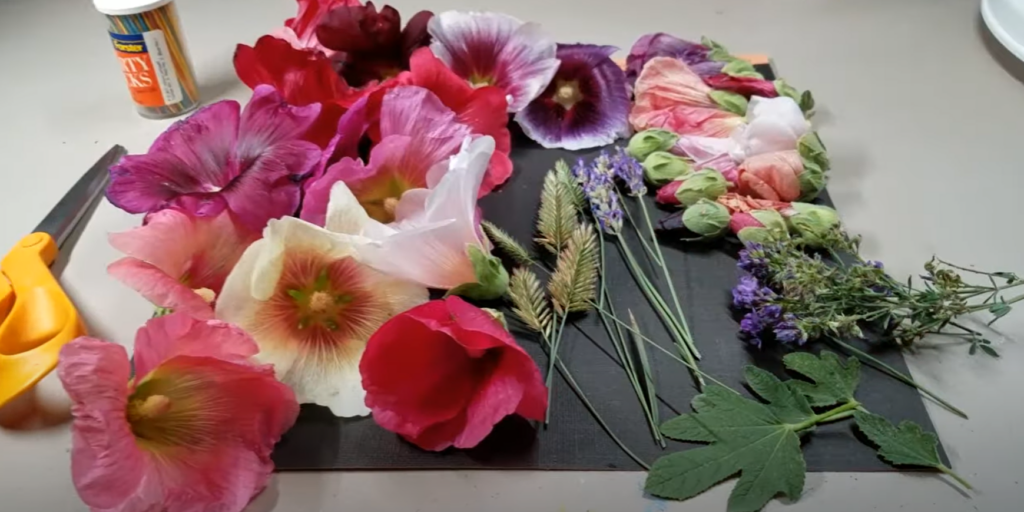
Start by picking a bunch of hollyhock flowers from your garden. Choose a mix of different sizes and colors to make a colorful group of dolls. Make sure the flowers are fresh so they stay bright and bendy. Remember, these dolls should be made with flowers and herbs that haven’t been treated with any chemicals. If you’re planning to use the dolls as a garnish, they must be safe to eat, even if they’re just for decoration.
Step 2: Wash and Dry the Flowers
After picking, wash and dry the hollyhock flowers, buds, and rosemary. Use a paper towel to gently dry them.
If you’re not going to make the dolls immediately, you can store the flowers in a bowl of water in the refrigerator for a few hours. However, these dolls are best made shortly after picking for the freshest look. If you plan to use them as a garnish, it’s best to make them just before serving to prevent wilting.
Step 3: Making the stand
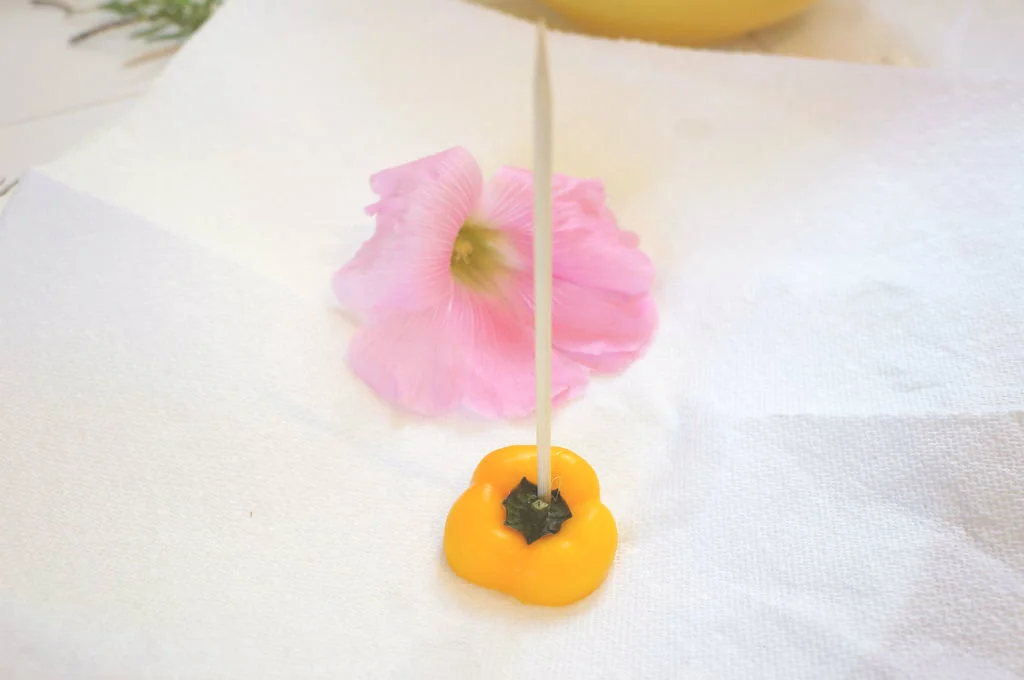
As you can see I used the ends of a baby bell pepper for the stand. I made these dolls several times but the carrot worked the best for the stand.
- Cut the end of the carrot as shown for the doll stand.
- Poke a hole in the carrot with the needle or pin.
- Insert the long toothpick in the center.
Step 4: Create the Doll’s Head
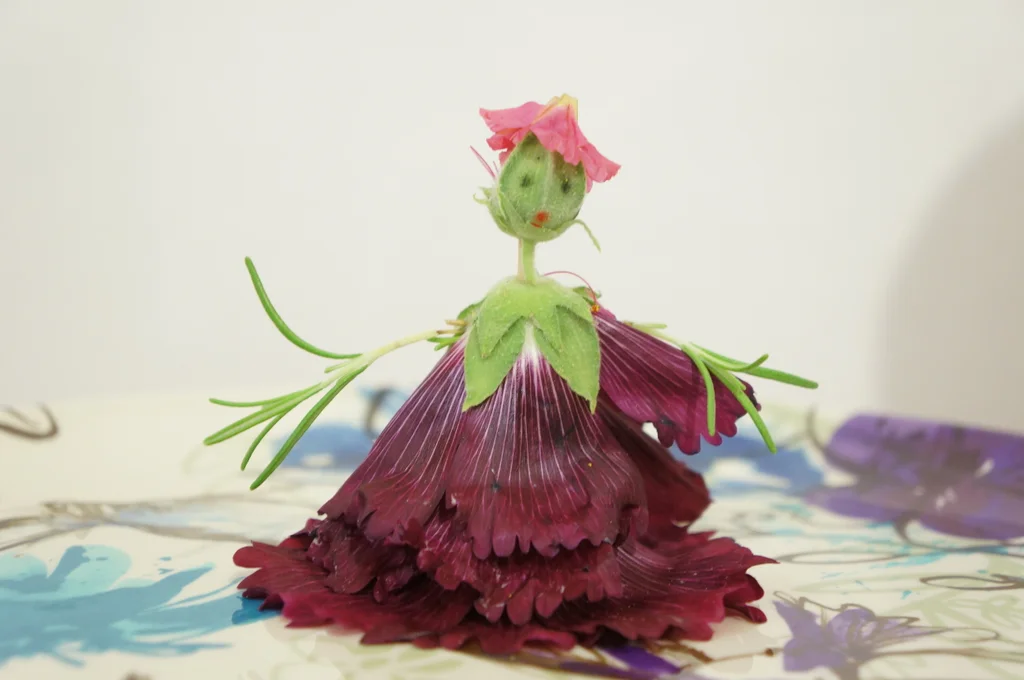
Select a smaller flower to use as the head of the doll. If you like, you can add a face to the flower using a bead or a tiny piece of fabric. Attach the face to the center of the flower using a small amount of glue.
Step 5: Form the Body
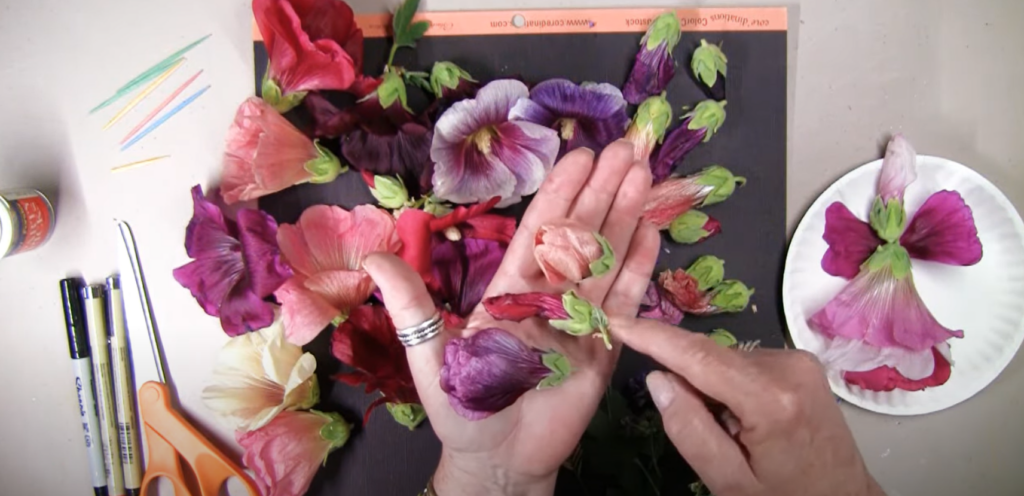
Select a larger flower to act as the doll’s body. Gently pierce the center of the flower with a toothpick or twig, creating a hole for the head to attach.
Step 6: Assemble the Doll
Gently slide the stem of the top flower into the hole of the bottom flower to join them together. If they feel a bit wobbly, a tiny dab of glue can work wonders to keep them in place.
Now, let me tell you, this step can be a bit tricky. Hollyhocks are pretty delicate, so I found out that using a pin is a lot easier for making those holes for the arms and the middle of the flower. You might mess up a few flowers before you get the hang of it, but that’s all part of the fun!
Next, snip off the stem from the flower. Then, carefully take out the stigma so the flower stays whole (but now the inside is kind of flat, making it easier to poke a hole through the center).
Grab a pin and poke a hole right through the middle of the flower. It’s all about being gentle and taking your time. And remember, practice makes perfect!
Step 8: Creating Details
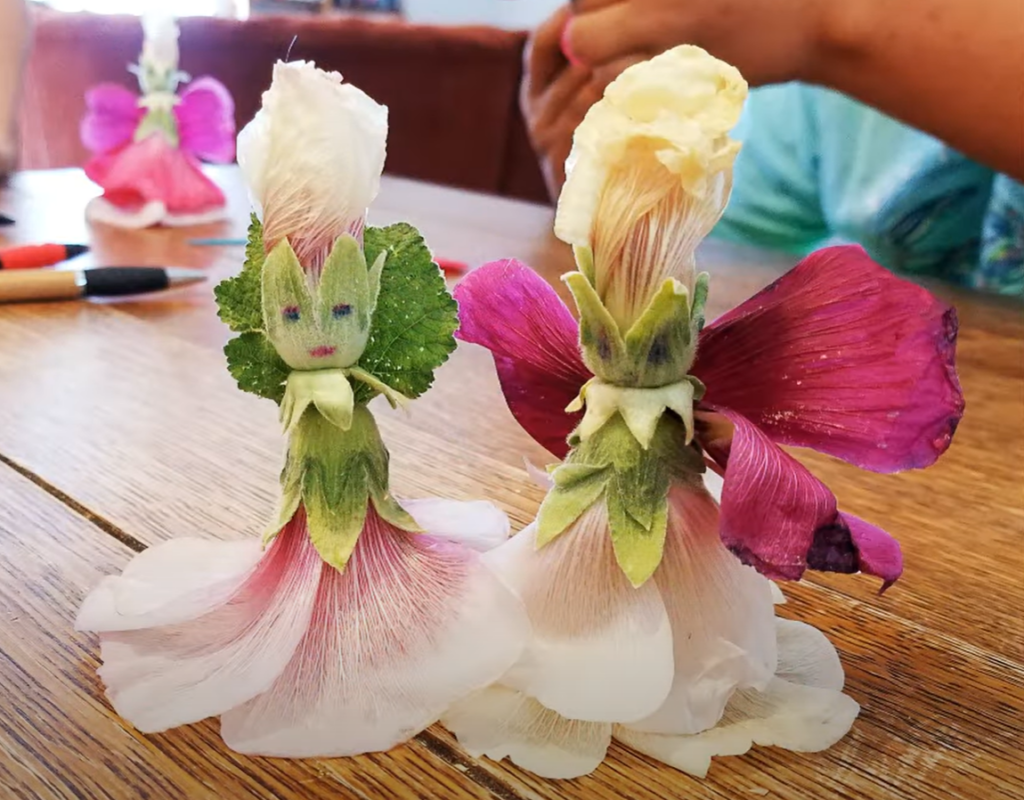
When it comes to creating details for your hollyhock doll, the possibilities are endless! Let your imagination run wild as you think about how to personalize your doll. Here are some creative ideas to consider:
- Facial Features: Use small beads, tiny buttons, or even seeds to craft intricate facial features for your doll. You can create eyes, a nose, and a mouth to give your hollyhock doll its own personality.
- Clothing Designs: Explore using fabric scraps, tiny ribbons, or paper cutouts to fashion unique clothing designs for your doll. Whether you want to create a flowing dress or a dapper suit, the choice is yours!
Step 9: Display and Enjoy
When it comes to displaying your hollyhock doll, the possibilities are endless. Here are some creative suggestions to showcase your creation:
- In a Small Flowerpot: Placing the hollyhock doll in a small flowerpot can create a whimsical garden theme. You can even add some faux grass or pebbles to enhance the setting.
- As Part of a Seasonal Centerpiece: Incorporating the hollyhock doll into a seasonal centerpiece is a great way to add a touch of nature to your decor. Pair it with seasonal flowers and greenery for a festive look.
Tips for Success:
- Handle the flowers gently to avoid bruising or damaging the petals.
- If you’re making these dolls with young children, supervise the use of toothpicks or consider using softer materials like pipe cleaners for safety.
- To extend the life of your flower dolls, keep them in a cool, shaded area and mist them lightly with water.
Creating hollyhock flower dolls is a delightful way to engage with the natural beauty of your garden. These enchanting figures not only serve as charming decorations but also as a reminder of the simple joys that nature provides. So, gather your blooms and let your creativity blossom into a world of floral fantasy!

Written By
Amber Noyes
Amber Noyes was born and raised in a suburban California town, San Mateo. She holds a master’s degree in horticulture from the University of California as well as a BS in Biology from the University of San Francisco. With experience working on an organic farm, water conservation research, farmers’ markets, and plant nursery, she understands what makes plants thrive and how we can better understand the connection between microclimate and plant health. When she’s not on the land, Amber loves informing people of new ideas/things related to gardening, especially organic gardening, houseplants, and growing plants in a small space.
